In this post I will show you how to install and set-up an Anaconda environment and give some examples on how to use the conda package manager.
What is Anaconda?
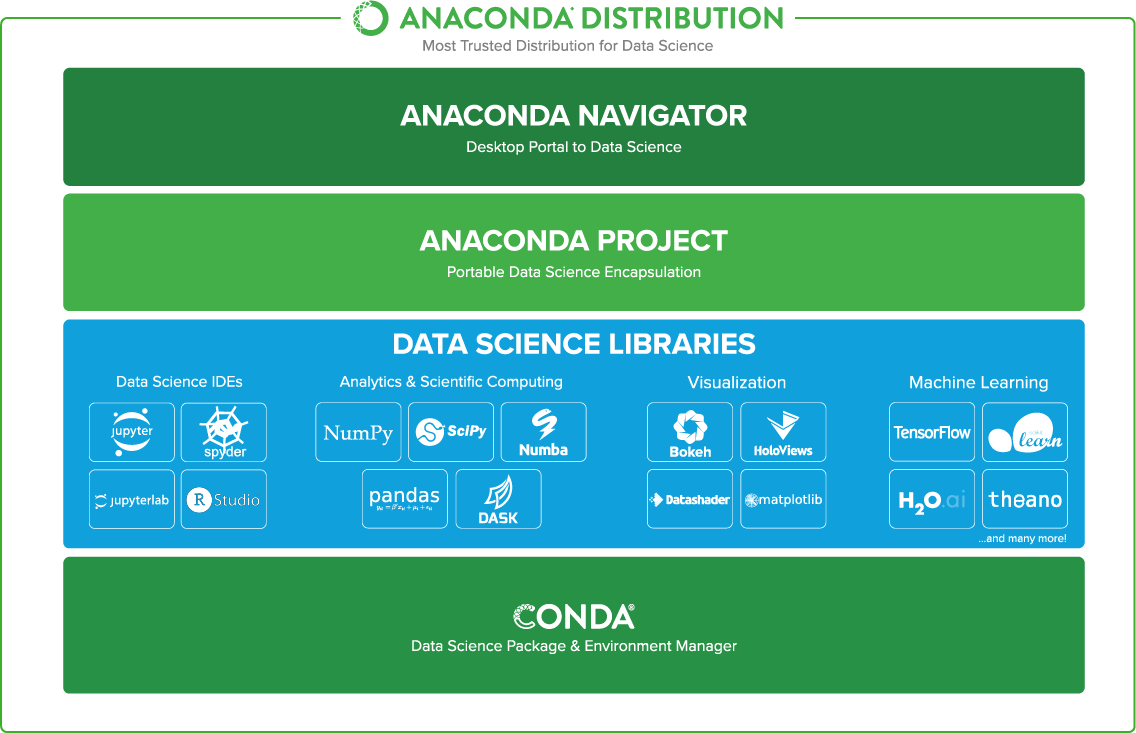
Anaconda is a free and open-source distribution of Python. It comes already with a lot (200+) of useful packages for data science projects installed. Like this you won’t have to through the trouble of installing every package by yourself. Furthermore, it lets you install additional packages easily with the Conda package manager. Here is an overview of what comes included in the distribution.
How to install Anaconda?
I am running on a Mac OS X so commands and details may vary depending on your OS. Go to the download section and choose the right installer for your OS. Follow through with the normal installation steps. Once you are done with that, you can check whether the installation was succesful by typing the following command into your console:
conda -V
> conda 4.4.10
If everything was succesful you should see the version number.
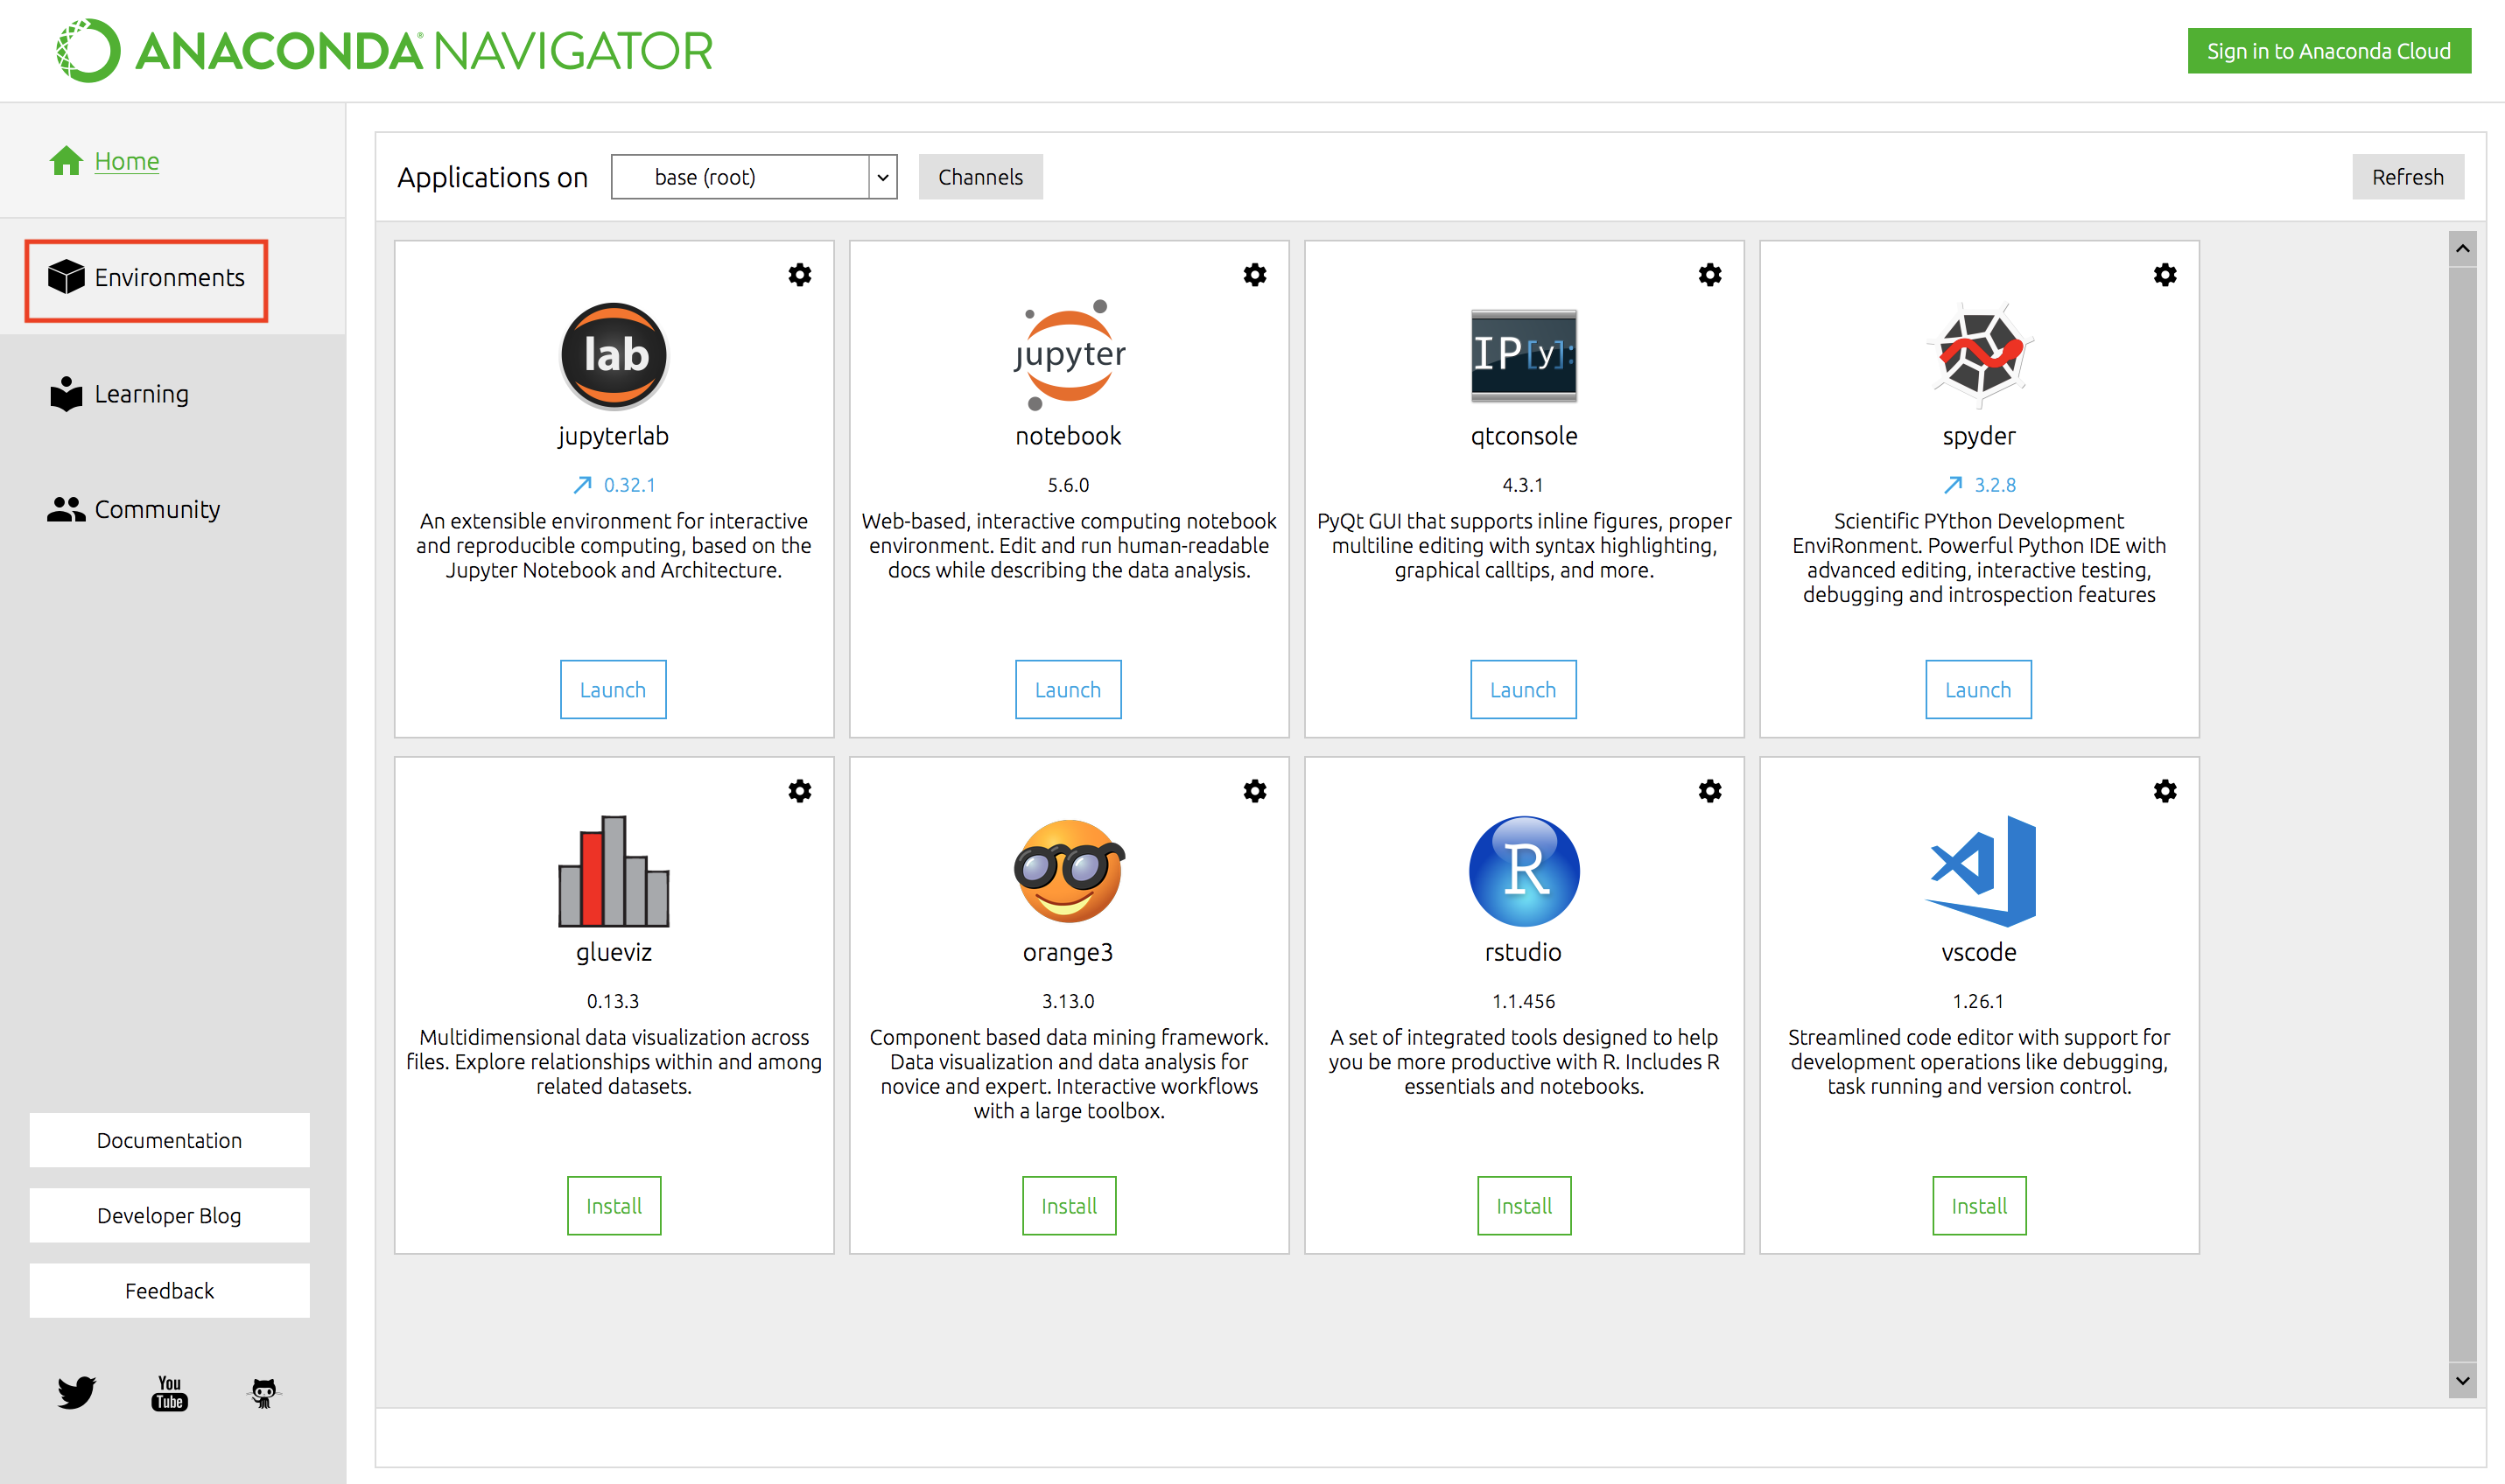
Another cool thing that comes included in the distribution is the Anaconda Navigator. By clicking on Environment you get a list of the installed packages.
Some of the most frequently used packages for data scientists are NumPy, Pandas, Matplotlib and scikit-learn. These packages are now presented a little bit more in detail. However, since this post is mainly concerned with setting up an Anaconda environment, I won’t go much into detail.
Included packages
NumPy
NumPy is a package for scientific computing. It provides a multi-dimensional array object and offers fast operations on arrays. This includes mathematical, logical, shape manipulation, sorting and many more. To learn more about NumPy refer to the official documentation.
Pandas
Pandas is a library that offers easy to use data structures and data analysis and visualization tools. They offer many Import/Output methods and in many projects you would read your data into a Pandas dataframe.
Matplot lib
Matplotlib is Python 2D plotting library which produces high-quality figures and grpahs.
scikit-learn
Scikit-learn offers simple and efficient tools for data mining and machine learning. The easy syntax makes it perfect for beginners to get fast results.
Using Anaconda in an IDE
By default Spyder is included into the Anaconda distribution. Spyder is a scientfic Python develeopment Environment. To be honest, I just discovered that this IDE comes included in the distribution when writing this article. So I cannot make any statements about how well it works. If you want to use Spyder please have a look at their website.
I am using PyCharm from JetBrains as my preferred Python IDE. Since I was used to programming Java in IntelliJ this IDE made it easy to learn about Python since the interface and hotkeys are similar, which made it one thing less to worry about.
When I look back when I tried to set up PyCharm with Anaconda it was quite difficult since I did not understand about virtual environments etc. at all. To make sure that all packages will be available in PyCharm you have to define the correct interpreter in the projects settings.
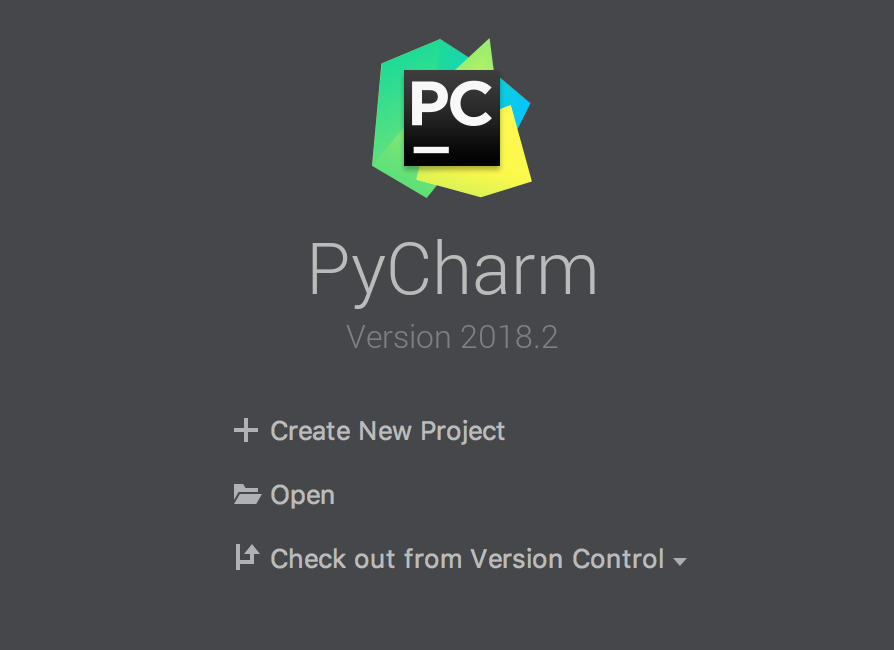
Creating a new project in PyCharm
When creating a new project in PyCharm your screen looks probably something like this:
Click on New Project - then a setup page should show:

Our project is going to be a Pure Python project. The important part is the interpreter. I remeber that by default this was set to a virtual environment. This might be what you want when working in a very specific project setting but most people probably want access to all the packages they installed in the normal environment. An evironment refers to certain Python version and some packages. It took me a while to figure out that what I wanted is to use an Existing interpreter. Make sure to select the Python version inside the Anaconda folder. Like this, PyCharm will automatically index all the available site packages in the Anaconda folder (usually /anaconda3/bin/python3.6).
Now you can write a simple Python script like this:
import numpy as np

print(np.version)
Conda package manager
As mentioned earlier anaconda is delivered with a lot of packages already installed. However, sometimes you want to add some packages that do not come by default. These are some useful commands to install new packages:
- Check if a non-installed package is available in the conda repo:
conda search beautifulsoup4 - Install a package:
conda install beautifulsoup4 - List of installed packages:
conda listI hope this post helps you to set up a working Anaconda environment so that you can start with your awesome projects. Feel free to leave a comment if you liked it or you had any trouble.